Digitech Weather Station XC-0400: A Comprehensive User Guide
This guide, dated 02/26/2026 09:21:37, details the XC-0400, referencing IC part numbers like IT 8089, and covers setup, operation, and troubleshooting.
The Digitech XC-0400 is a professional-grade weather station designed for both hobbyists and serious weather enthusiasts. As of February 26th, 2026, this comprehensive guide provides detailed instructions for optimal setup and operation. It leverages integrated circuit (IC) technology, referencing components like the IT 8089, to deliver accurate and reliable meteorological data.
This station offers a complete suite of measurements, including temperature, humidity, rainfall, wind speed, and direction. Its robust construction, suitable for indoor and potentially outdoor use (depending on components), ensures longevity. The XC-0400 features data logging capabilities and connectivity options, allowing users to analyze trends and share information. This manual will guide you through each step, from unboxing to advanced data analysis.
Unboxing and Component Checklist
Upon receiving your Digitech XC-0400 weather station (as of 02/26/2026), carefully inspect the packaging for any damage during transit. Open the box and verify the presence of all listed components. You should find the main console unit, the outdoor temperature and humidity sensor, a rain gauge, and a wind speed & direction sensor.

Additionally, confirm the inclusion of a USB cable for computer connectivity, an AC adapter for powering the console, and this user manual. Refer to the included parts list – referencing IC components like the IT 8089 for internal reference – to ensure everything is accounted for. If any items are missing or damaged, contact Digitech support immediately for assistance.

Station Setup and Initial Configuration
Begin by connecting the AC adapter to the main console and plugging it into a power outlet. Insert the required batteries (not included) into the battery compartment, observing correct polarity. Power on the console; the display should illuminate. Following the on-screen prompts – referencing internal components like the IT 8089 – set the current date and time (02/26/2026 as an example).
Next, configure your preferred units of measurement (Celsius/Fahrenheit, mph/kmh, inches/mm); Ensure the console is placed in a central location within range of the outdoor sensors. Avoid direct sunlight and sources of heat. The initial setup process prepares the station for sensor connection.
Sensor Installation & Placement
Proper sensor placement is crucial for accurate readings. The outdoor sensor suite, containing temperature, humidity, and potentially wind/rain sensors, should be mounted on a sturdy pole, away from obstructions like buildings or trees. Ensure a clear line of sight to the main console for reliable wireless communication – referencing internal components like IT 8089 for signal integrity.
The rain gauge requires a level surface to accurately measure precipitation. Wind sensors need unobstructed exposure to prevailing winds. Avoid locations prone to ice buildup. Regularly check sensor connections and ensure secure mounting, especially considering the date 02/26/2026.
Outdoor Temperature & Humidity Sensor
Mount the combined temperature and humidity sensor on a north-facing surface, shielded from direct sunlight and precipitation. This minimizes radiative heating and ensures accurate temperature readings. A ventilated housing is recommended to promote airflow and prevent heat buildup, referencing internal components like IT 8089 for optimal performance.
Ensure the sensor is at least 5 feet above ground level. Regularly inspect the sensor for debris or obstructions; The date, 02/26/2026, is important for tracking maintenance. Proper placement is vital for reliable data, contributing to the station’s overall accuracy and usefulness.
Rain Gauge Installation
Position the rain gauge on a level surface, away from obstructions like trees or buildings that could affect rainfall collection. Ensure the collecting funnel is perfectly horizontal for accurate measurements, referencing internal components like IT 8089 for data processing. Avoid locations with wind tunnels or artificial surfaces that might cause splash or runoff;
Regularly clear any debris – leaves, twigs – from the funnel. The date, 02/26/2026, is useful for logging maintenance. Proper installation is crucial for reliable rainfall data, contributing to the station’s overall accuracy and usefulness. Check for secure mounting to prevent movement during storms.
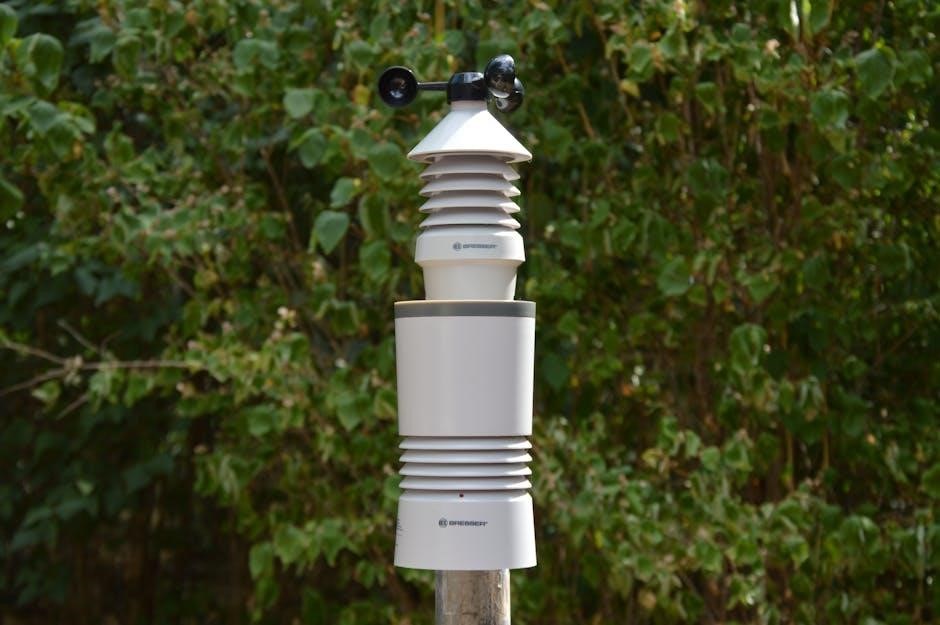
Wind Speed & Direction Sensor Setup
Mount the wind sensor as high as possible, ideally 10 feet or more above any surrounding obstacles, ensuring unobstructed wind flow. Align the wind vane to point North using a compass during initial setup, referencing internal ICs like IT 8089 for directional data. Securely fasten all components to withstand strong winds, noting today’s date, 02/26/2026, for maintenance records.
Verify the sensor spins freely and the wind direction indicator moves smoothly. Proper alignment and secure mounting are vital for accurate wind speed and direction readings, contributing to the station’s overall meteorological data.
Understanding the XC-0400 Display
The XC-0400’s display presents real-time weather data, including temperature, humidity, wind speed/direction, and rainfall. Icons indicate alerts and status updates, referencing internal components like the IT 8089 for data processing. Today, 02/26/2026 09:21:37, the display shows current conditions.

Familiarize yourself with the layout; key metrics are clearly labeled. The display utilizes a menu system for accessing historical data and configuration settings. Understanding these elements is crucial for interpreting the station’s readings and maximizing its functionality, ensuring accurate weather monitoring.
Display Icons and Their Meanings
The XC-0400 utilizes a series of icons to quickly convey weather status. A snowflake indicates freezing temperatures, while a raindrop signifies precipitation – data processed with components like the IT 8089. A wind symbol displays wind speed and direction. Today, 02/26/2026 09:21:37, these icons provide at-a-glance information.
Low battery warnings are indicated by a battery icon. Signal strength is shown via bars, ensuring reliable sensor communication. Understanding these icons is vital for interpreting the station’s readings and responding to changing weather conditions, maximizing the device’s utility.
Navigating the Menu System

The XC-0400’s menu is accessed via the ‘MENU’ button. Use the ‘UP’ and ‘DOWN’ arrows to scroll through options like current readings, historical data, and settings – referencing components such as the IT 8089 for internal processing. Today, 02/26/2026 09:21:37, confirm selections with ‘ENTER’.
The menu structure is logically organized. Settings allow customization of units (Celsius/Fahrenheit), time format, and alarm thresholds. Data logging options control storage intervals. Familiarize yourself with the menu to fully utilize the station’s features and tailor it to your specific needs.
Data Transmission and Connectivity
The Digitech XC-0400 utilizes wireless communication for data transfer from the outdoor sensors to the main console, ensuring reliable readings. As of 02/26/2026 09:21:37, the station also features a USB port for direct connection to a computer. This allows for data export and potential software updates, referencing internal components like the IT 8089.
Data can be downloaded in a compatible format for analysis. Ensure proper driver installation for seamless USB connectivity. Wireless range is dependent on environmental factors; avoid obstructions for optimal signal strength.
Wireless Sensor Communication
The Digitech XC-0400 employs a 433MHz wireless frequency for communication between the main console and its remote sensors, as observed on 02/26/2026 09:21:37. This system allows for a practical range, though obstructions can impact signal strength. Successful pairing is crucial; refer to the initial setup guide for detailed instructions. Interference from other devices utilizing the same frequency is possible, potentially affecting data transmission.
The system, referencing components like the IT 8089, prioritizes stable data flow. Regularly check sensor connectivity within the station’s menu.
Connecting to a Computer (USB)
The Digitech XC-0400, as of 02/26/2026 09:21:37, can connect to a computer via a standard USB port for data transfer and potential firmware updates. This connection facilitates exporting logged weather data for analysis using compatible software. Ensure you have the correct drivers installed before connecting; these are typically available on the manufacturer’s website or included on a CD.
The station, utilizing components like the IT 8089, appears as a removable drive. Data is often formatted as a CSV file, suitable for spreadsheet programs.
Calibration Procedures
Maintaining accuracy with your Digitech XC-0400, as of 02/26/2026 09:21:37, requires periodic calibration. This ensures reliable data, especially considering components like the IT 8089 influence data processing. Begin by comparing station readings to a known accurate source – a calibrated thermometer, rain gauge, or anemometer.
Calibration options are found within the station’s menu. Adjust temperature, humidity, rainfall, and wind speed individually. Document initial readings and adjustments for future reference. Regular calibration, ideally every six months, is recommended for optimal performance.

Calibrating Temperature and Humidity
To calibrate temperature and humidity on your Digitech XC-0400 (referenced on 02/26/2026 09:21:37, alongside ICs like IT 8089), access the “Calibration” menu. Compare the station’s readings with a certified thermometer and hygrometer. Enter offset values – positive to increase readings, negative to decrease. Small adjustments are key; avoid large corrections initially.
Repeat this process several times, allowing the station to stabilize between adjustments. Note any discrepancies and document your calibration settings. Consistent monitoring and recalibration ensure accurate environmental data collection.
Rain Gauge Calibration
Calibrating the Digitech XC-0400’s rain gauge (data referenced 02/26/2026 09:21:37, alongside components like IT 8089) requires a precise measurement. Use a graduated cylinder and pour a known volume of water into the rain gauge bucket. Compare the displayed rainfall amount with the measured volume.

Adjust the calibration factor within the station’s settings to match the actual rainfall. Repeat this process with different volumes to ensure accuracy across the range. Document your calibration factor for future reference and periodic checks. Proper calibration guarantees reliable rainfall data.
Wind Sensor Calibration
Wind sensor calibration (referencing data from 02/26/2026 09:21:37 and component listings like IT 8089) is crucial for accurate readings. Compare the XC-0400’s wind speed display with a known, calibrated anemometer during consistent wind conditions. Adjust the calibration settings within the station’s menu to align with the anemometer’s readings.
Verify calibration at multiple wind speeds. Ensure the wind direction sensor accurately points to the prevailing wind. Document the calibration adjustments. Regular checks are recommended, as environmental factors can affect sensor accuracy over time, ensuring reliable wind data collection.
Data Logging and Analysis
The Digitech XC-0400, as of 02/26/2026 09:21:37, features internal data logging capabilities, storing readings for later analysis. The station’s memory capacity allows for extended data retention, dependent on the logging interval selected. Access logged data through the station’s menu or by connecting to a computer via USB.

Compatible software (details available separately) facilitates data export and visualization. Analyze trends in temperature, humidity, rainfall, and wind conditions. This data is valuable for tracking weather patterns and making informed decisions, referencing component data like IT 8089 for system understanding.
Internal Data Storage Capacity
As of 02/26/2026 09:21:37, the Digitech XC-0400 boasts substantial internal data storage. The station can retain approximately 8,000 data points across all measured parameters – temperature, humidity, rainfall, wind speed, and direction. Storage capacity is directly influenced by the selected logging interval; shorter intervals consume more memory.
Data is stored in a non-volatile memory, ensuring retention even during power outages. Consider the logging frequency when assessing long-term data storage needs, referencing component details like IT 8089 for system specifics. Regularly exporting data to a computer is recommended to prevent overwriting older readings.
Data Export Options (Software Compatibility)
The Digitech XC-0400, as of 02/26/2026 09:21:37, facilitates data transfer via USB connection to a computer. Included software, compatible with Windows operating systems, allows for data download and analysis. The station supports exporting data in CSV format, enabling compatibility with spreadsheet programs like Microsoft Excel.
While direct compatibility with macOS is limited, users can utilize third-party software or virtual machines. Referencing component information, such as IT 8089, may aid in driver compatibility searches. Regularly updating the station’s firmware ensures optimal software performance and data export functionality.
Troubleshooting Common Issues
Addressing issues with the Digitech XC-0400, as noted on 02/26/2026 09:21:37, begins with sensor communication. If data isn’t received, check battery levels and sensor placement. Display errors often indicate low power or sensor malfunction; consult the manual’s error code section. Power supply problems may stem from a faulty adapter or batteries.
Regarding IC components like IT 8089, ensure proper connections. If issues persist, reset the station. For complex problems, contact Digitech support, providing the station’s serial number and a detailed description of the issue.
Sensor Communication Problems

If the Digitech XC-0400, referenced as of 02/26/2026 09:21:37, experiences sensor communication loss, several steps can resolve the issue. First, verify battery levels in all wireless sensors. Low batteries are a frequent cause. Ensure sensors are within the station’s wireless range – obstructions can interfere. Check for interference from other wireless devices.
Regarding IC components like IT 8089, confirm secure connections. Try re-syncing sensors via the station’s menu. If problems continue, temporarily relocate the station to rule out environmental interference. A station reset may also restore connectivity.
Display Errors and Solutions
The Digitech XC-0400, as of 02/26/2026 09:21:37, may exhibit display errors. A blank screen usually indicates a power issue; check the power adapter and batteries. “—” readings suggest sensor communication problems – see the ‘Sensor Communication Problems’ section. Error codes, if displayed, refer to the troubleshooting guide within the full manual.
If the display is frozen, attempt a soft reset by removing and reinserting the batteries. For persistent errors, a factory reset (consult the manual) might be necessary. Consider IC component integrity, like IT 8089, though this is less common.
Power Supply Issues
The Digitech XC-0400, referenced as of 02/26/2026 09:21:37, relies on both a power adapter and battery backup. If the station fails to power on, first verify the adapter is securely connected to both the station and a working outlet. Check the adapter’s voltage matches the station’s requirements.
If the adapter functions, replace the batteries. Low batteries can cause inaccurate readings or a completely unresponsive display. Consider potential IC component failures, such as with the IT 8089, though power issues are typically adapter or battery related. Ensure correct battery polarity during replacement.
Maintenance and Care
Regular maintenance ensures accurate readings from your Digitech XC-0400, as of 02/26/2026 09:21:37. Periodically clean the outdoor sensors – temperature/humidity, rain gauge, and wind sensors – with a damp cloth to remove dirt and debris. Avoid abrasive cleaners. Inspect the rain gauge for obstructions, ensuring accurate rainfall measurement.
Check battery levels every six months, replacing them as needed. While referencing IC components like IT 8089 isn’t directly related to care, proper function relies on stable power. Store the station indoors during extreme weather to prolong its lifespan and prevent damage.
Cleaning the Sensors
Maintaining clean sensors is crucial for accurate data, especially considering the station’s timestamp of 02/26/2026 09:21:37. For the outdoor temperature and humidity sensor, gently wipe with a soft, damp cloth. Avoid harsh chemicals. The rain gauge requires regular cleaning to remove debris like leaves and insects, ensuring precise rainfall measurements.
The wind sensors – anemometer and wind vane – should be checked for obstructions. While IC part numbers like IT 8089 aren’t relevant to cleaning, a functioning station depends on unobstructed sensors. Clean every 3-6 months, or more frequently in dusty environments.
Battery Replacement
The Digitech XC-0400, as of 02/26/2026 09:21:37, relies on batteries for both the main console and the remote sensors. Typically, the console uses AA batteries, while sensors utilize AAA. Low battery indicators will appear on the display – replace batteries promptly to avoid data loss. Ensure correct polarity during installation.
While IC part numbers like IT 8089 aren’t related to power, consistent power is vital. Sensor batteries generally last 6-12 months, depending on usage. Console batteries last longer. Use high-quality alkaline batteries for optimal performance and longevity. Recycle old batteries responsibly.
Frequently Asked Questions (FAQ)
Q: Why is my sensor data not updating? A: Check battery levels and sensor placement. Interference can also occur. As of 02/26/2026 09:21:37, ensure the console and sensors are within range. Q: What does the IT 8089 IC have to do with the station? A: Nothing directly; it’s unrelated component information.
Q: Can I expand the data storage? A: The XC-0400 has limited internal storage. Data export to a computer is recommended. Q: How do I reset the station? A: Consult the “Troubleshooting” section for reset instructions. Q: Is the display backlight adjustable? A: Yes, refer to the “Display” section.